Discover Easy DIY Jewelry Making Ideas at Home
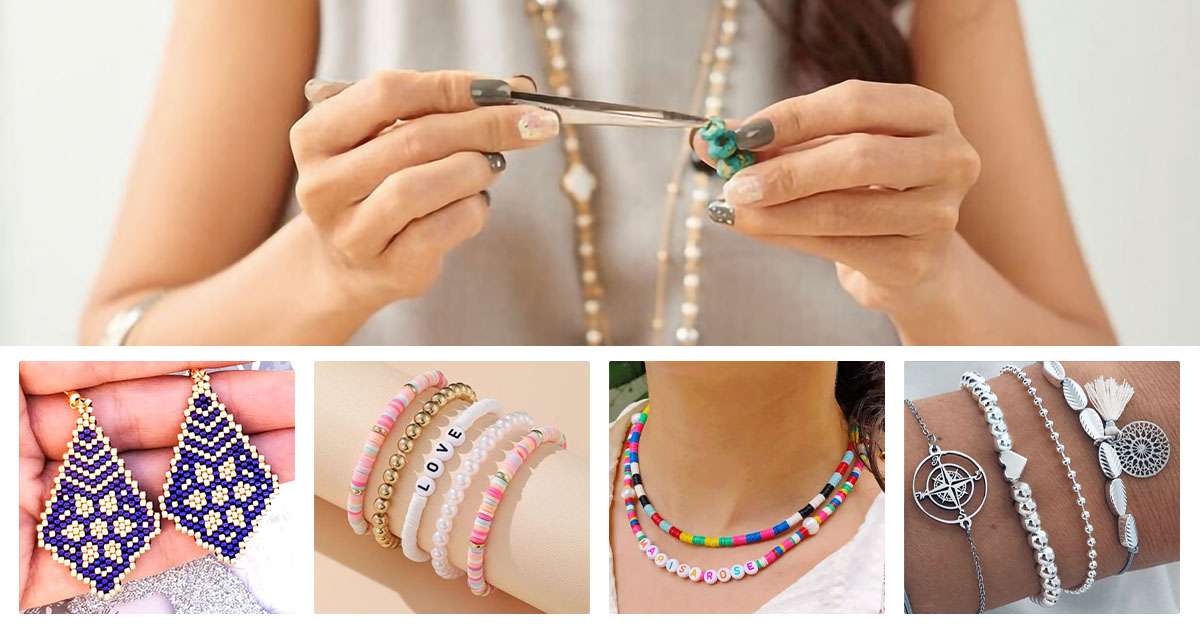
Are you in search of effortless DIY jewelry-making ideas? Crafting your jewelry in the comfort of your own home is an excellent way to both economize and unleash your creativity. Additionally, homemade jewelry serves as a wonderful present for loved ones. Here, we offer a selection of simple DIY jewelry projects that are doable by anyone from the comfort of their own home.
Some Easy Jewelry Accessories to Make: A Beginner’s Guide
If you want to start your own jewelry business, below are examples of easy DIY jewelry options to begin with:
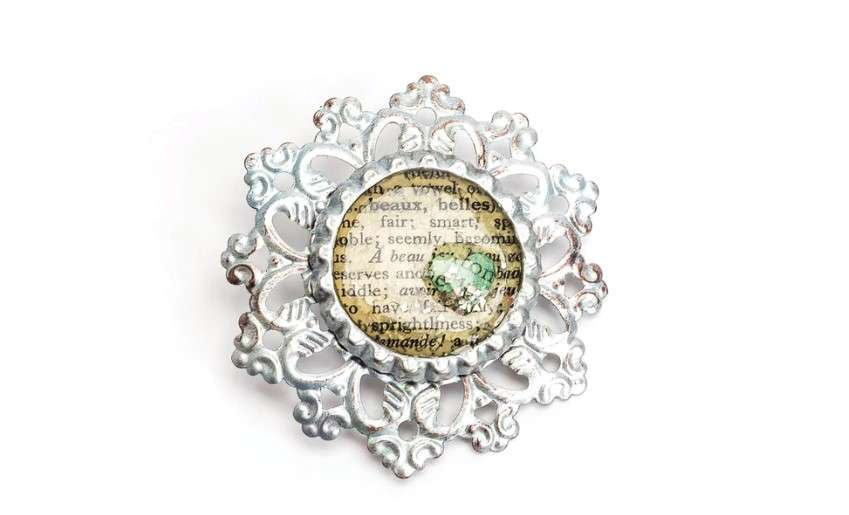
Vintage brooch
To make a unique bottle cap brooch, first, flatten the bottle cap using a die-cutting machine or a hammer. Then, cut a circle from book page paper to fit inside the bottle cap’s base and glue it in place. Create a tiny heart or other design from cream text paper, color it with ink (like Distress Ink), and attach it to the paper in the bottle cap.
Apply glossy accents to the paper and add chunky glitter around the heart’s edges. Next, die-cut a lace circle from strong cardstock and paint it silver. If you don’t have strong cardstock, layer multiple shapes for strength, or consider painting a large vintage mechanical object silver (e.g., old pocket watch parts). Once everything is dry, mount the bottle cap on top of the lace circle and attach a brooch pin to the back using strong glue. Enjoy your homemade bottle cap vintage-like jewelry!
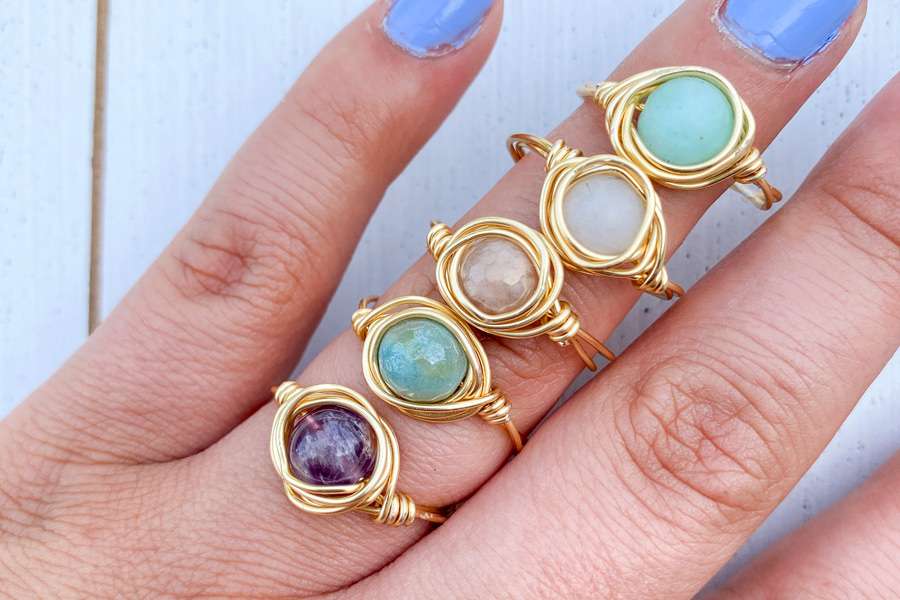
DIY Stone and wire-wrapped rings
Start with your ring mandrel, an inexpensive tool (usually around $5) that allows you to choose your ring’s size. The notches and marks on the mandrel represent different ring sizes. For instance, if you want a size 7 ring, wrap your wire around the “7” mark. The notches between the numbers indicate half-sizes. Begin by cutting about an 11-inch piece of wire and placing your ring mandrel or ring gauge in the middle.
Thread both ends of the wire through your stone bead in opposite directions and pull it tightly around the mandrel to determine the correct size. Wrap the excess wire on each side of your stone in opposite directions around the mandrel until you have approximately 3 inches remaining on both sides. Use jewelry pliers to secure the excess wire under the wrapped strands, using the indent on the backside of the mandrel. Continue this process until you’ve used up all the wire and it’s securely fastened. If there are any rough wire edges, gently sand them with extra-fine sandpaper and tuck them into the stone to ensure comfort.
Upcycled earrings
To create these earrings, begin by tearing a page from a magazine and marking 35mm from one corner along the bottom edge, then marking 30mm across the top edge. Connect these marks with a line. Do the same by measuring 30mm across the top edge and 25mm across the bottom edge. Repeat this process, reducing the measurements by 5mm each time until you have five strips.
Cut them out and stick them together, forming a long, triangular wedge shape. Roll one strip from the wide end using a bamboo skewer, keeping the base flat, and glue the tip. Make a mirrored second earring, starting from the opposite edge of a magazine page. Apply a thin layer of glue as varnish and let it dry. Thread a large bead onto a headpin, pass it through the paper bead, add a coordinating seed bead, bend the headpin at a right angle, trim to 8mm, and create a loop. Attach an earring wire and repeat for the second earring.
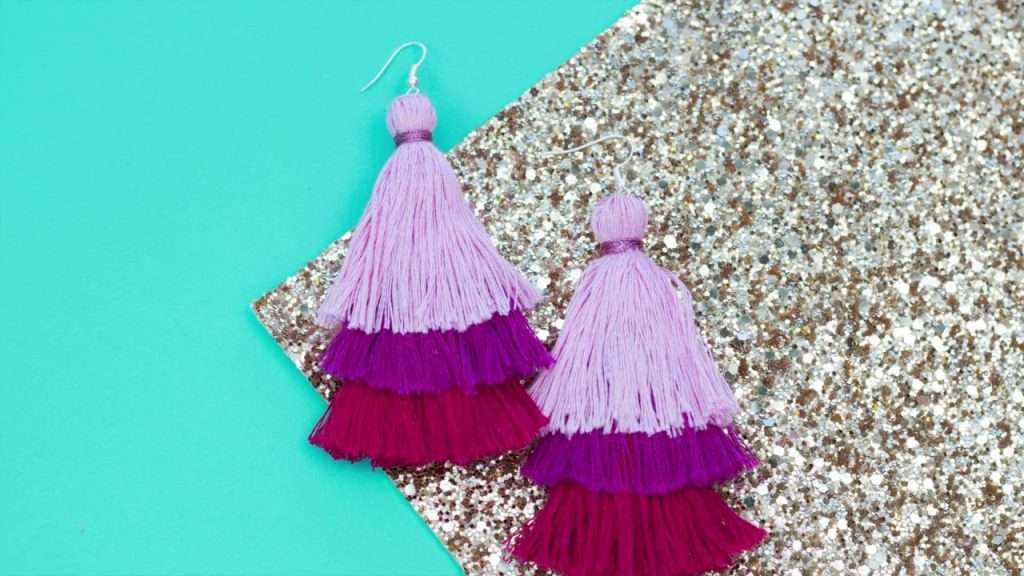
DIY Layered Tassel Earrings
Start by cutting a 5 x 5-inch square from cardboard, which results in a 2.5-inch tassel length. Adjust the length according to your preference. Wind embroidery floss around the cardboard until you use up the skein, then carefully cut both sides along the edge of the card. Place two stacks of thread on top of each other and tie a vertical piece of floss into a single knot to secure them. Fold the threads in half and wind another piece of floss about 1/2 inch from the top. Secure with a tight double knot and trim excess floss.
Comb the tassel with a wide-tooth brush and wrap it like a sushi roll with tape. Straighten the tassel by cutting along the tape’s lower edge and then unwrap it. Repeat this process with two different floss colors. Open the top tassel, apply a dot of hot glue in the center, place the top of the second tassel on it, and let it cool. Repeat for the next tassel. Lastly, attach an earring hook to the top of the tassel and trim any excess thread.
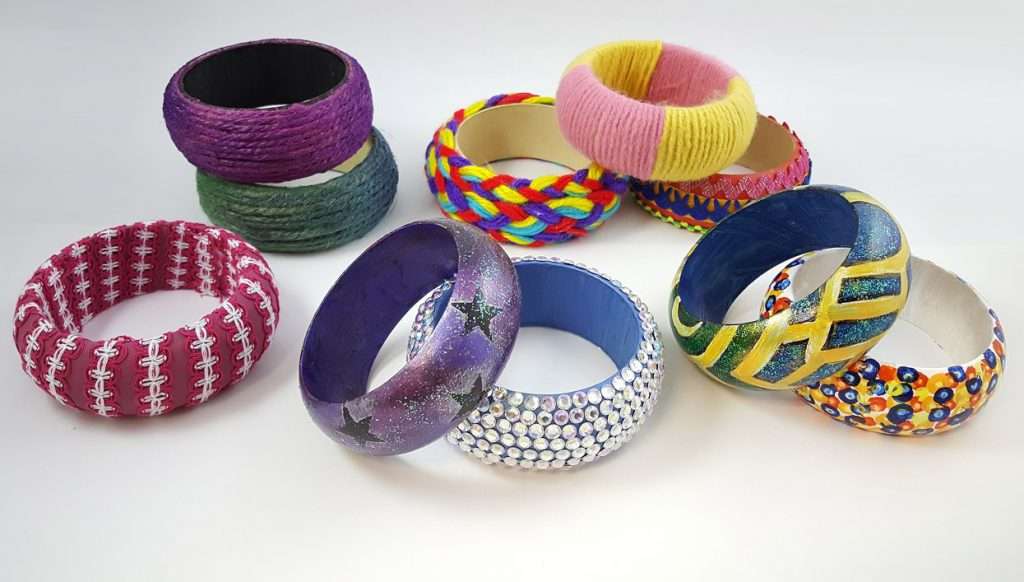
Abstract Painted Wood Bangle Bracelet
To create these painted wooden bangle bracelets, start by mixing your chosen paint colors with an equal amount of white gesso to achieve pastel hues. Apply these colors randomly to the bracelet using a Filbert paintbrush, leaving spaces for other colors. Let each layer dry completely. Repeat this process with the remaining colors, allowing you to decide how much wood you want to show through.
Optionally, paint the inside of the bracelet. Add random black marks with carbon black paint using a liner brush and let them dry. Apply DecoFoil Liquid Adhesive with an old paintbrush and let it dry until tacky. Then, using high-gloss varnish, coat your bracelet to protect it and give it a shiny finish. Now you have your beautiful painted wooden bangle bracelet!
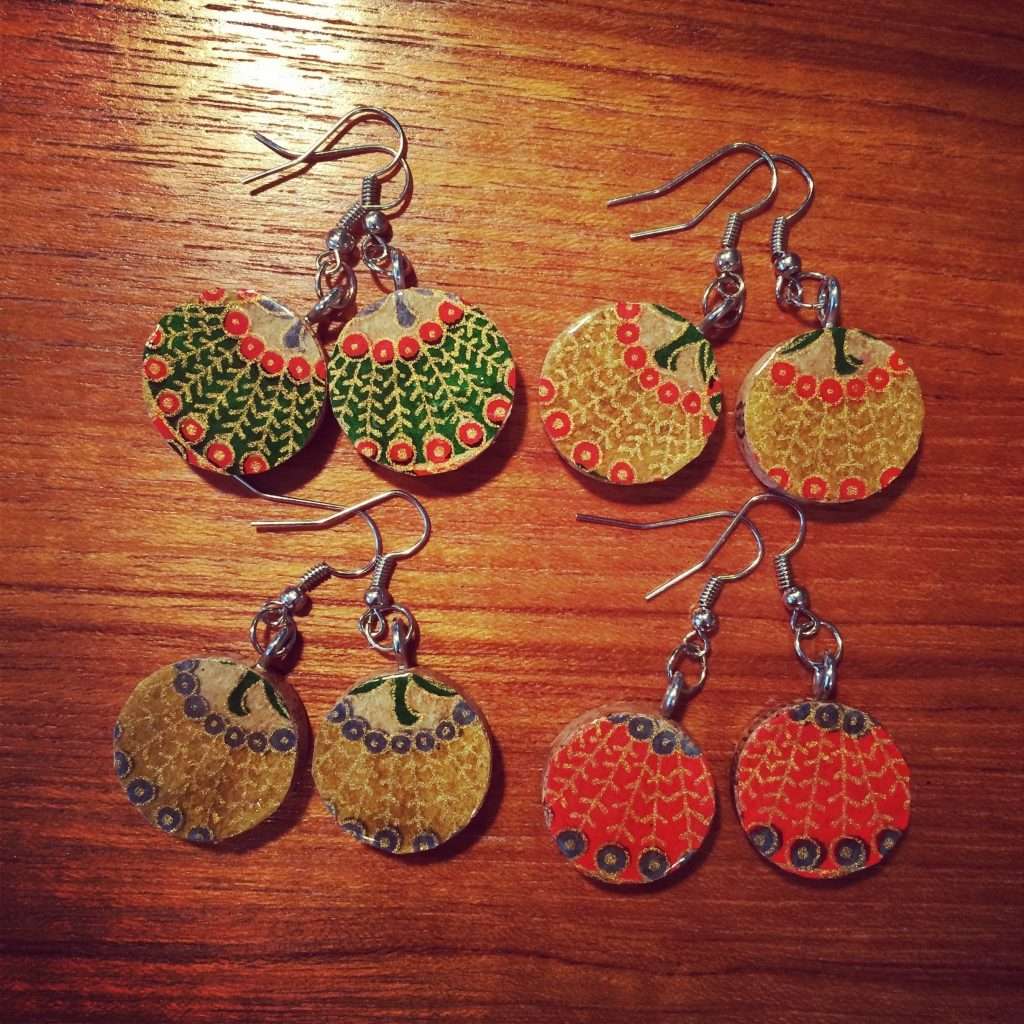
Upcycled cork earrings
Start by slicing your corks into 4-5mm-thick pieces using a wide-blade knife. Pick two cork slices for your earrings. Cut two squares of paper, preferably pink, and glue them onto one side of each cork slice using PVA glue. Let them dry, and then trim the paper around the edges. Next, get creative with decorations; you can stamp tiny flowers on them or add some beads around them.
Now, pierce a hole through each cork slice with a large glass-headed pin. Insert a long headpin and add a couple of beads. Bend the headpin at a right angle, just above the beads. Trim the excess tail to about 7mm and form a loop using round-nosed pliers. Lastly, attach the earring wire, and you’re all set!
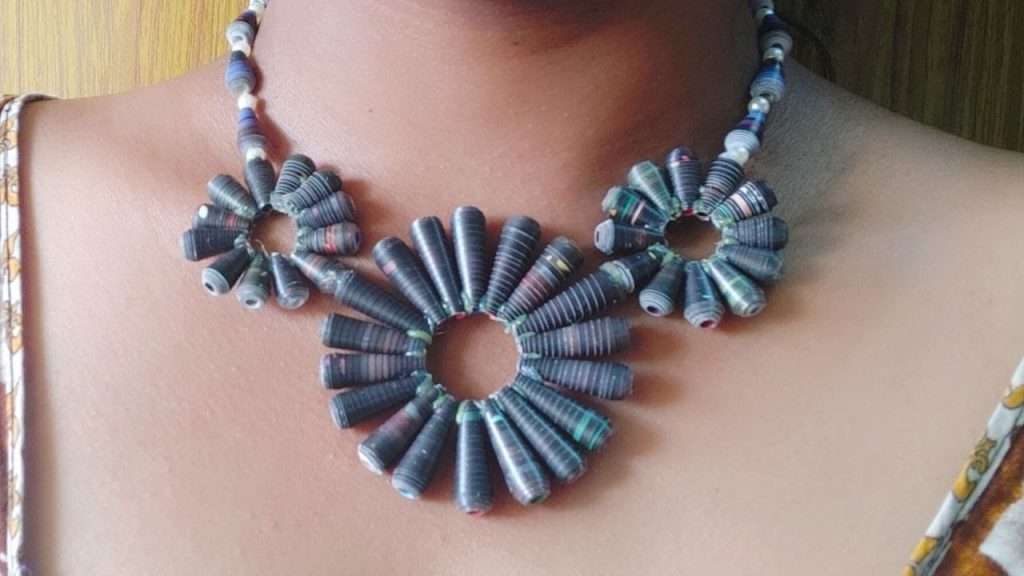
DIY beaded necklace
Begin by cutting 11 thin triangles from text paper. Color each of them with ink, with a focus on making the edges darker than the centers (Distress Inks work well for this). Then, roll up each triangle around a bamboo skewer to form bead shapes, secure the ends with glue, and slide them onto a piece of necklace chain as demonstrated to complete your necklace.
Unique Jewelry Craft Ideas for Business or Gifting
Whether you’re crafting for personal style or thinking about starting your own jewelry business, these ideas offer a range of options to get you started. From upcycled bottle cap brooches and quilled necklaces to abstract painted wooden bangle bracelets and cork earrings, there’s something for everyone. Create unique pieces that express your individuality and save money while doing it. These homemade jewelry ideas also make for fantastic personalized gifts for your loved ones.